Technical SEO for Websites: Complete 2026 Guide
Starting a website is a big step. Maybe you just launched it, or maybe you're still in the planning stage sketching ideas and figuring things out. Either way, getting to this point takes effort and a bit of courage. At some point though, a simple question starts to creep in:
How will people actually find it?
Publishing a website doesn't automatically bring visitors. Search engines need to understand your site before they can show it to people who are looking for what you offer. That’s where SEO comes in. It's the foundation that helps search engines crawl, understand, and rank your pages.
I've been working in SEO long enough to know that most people get overwhelmed by the technical side. The truth is, once you understand the basic concepts and see how they apply to real websites, it becomes far less intimidating. I'll show you exactly how to audit and optimize your site's technical foundation using https://valpha-search.vercel.app/, as our working example throughout. This is a live deployment that features research tools, and it gives us something concrete to audit and optimize rather than working with hypothetical scenarios.
Understanding the Three Pillars of SEO
Before getting into the specifics, it helps to understand where technical SEO fits in the bigger picture. There are three main areas of SEO that you need to work on together.
Technical SEO handles everything behind the scenes. It's about making sure search engines can crawl your site efficiently, understand your page structure, and index your content without running into barriers. When your technical foundation is solid, crawlers don't waste time on broken links, duplicate content, or pages that take forever to load.
On-page SEO focuses on the content itself and how you structure individual pages. This includes your headlines, body content, internal linking, and how clearly you communicate what each page offers. You're essentially making sure both search engines and real people can understand what your page is about and why it matters.
Off-page SEO happens outside your website. This mainly involves building your site's authority through backlinks from other websites, brand mentions, and external signals that tell search engines your content is trustworthy and valuable.
These three areas don't work in isolation. You can have brilliant content that ranks nowhere because your technical setup blocks crawlers. You can have perfect technical infrastructure that fails because your content is thin or irrelevant. You can build authority through backlinks, but if your site is slow and broken, that authority doesn't translate into rankings.But when all three pieces come together, search engines can crawl your site without problems, understand what your pages are about, and see your site as trustworthy. When that happens, your pages have a much better chance of appearing higher in search results.
What Is Technical SEO and Why Does It Matter?
Technical SEO is the foundation that determines whether search engines can even work with your website. You're removing barriers that prevent Google and Bing from discovering, accessing, and properly understanding your pages.
Think about what happens when a search engine crawler visits your site. It needs to find your pages, download the content, process the information, and decide which pages deserve to be in the search index. If your site has crawl blocks, confusing URL structures, slow servers, or duplicate content issues, the crawler either misses important pages or wastes resources on pages that don't matter.
The main areas that fall under technical SEO include:
- Crawling and indexing controls through robots.txt, sitemaps, canonical tags, and proper status codes
- Site architecture, including internal linking, URL structure, and click depth
- Page performance and Core Web Vitals
- Mobile rendering and mobile-first indexing readiness
- Duplicate content and parameter handling
- HTTPS, redirects, and crawl error management
We will go through each of these practically. For auditing, I will be using SEO Analyzer Pro, which speeds up the process considerably by pulling technical data across the whole site in one go instead of checking pages manually one by one.
Let's now go through each of these in detail.
HTTPS Implementation and Security
If your entire site already runs on HTTPS, you can skip this section entirely. But if you're still running any pages on HTTP, this needs to be your first priority.
HTTP and HTTPS are protocols that control how information travels between a user's browser and your web server. HTTP sends everything in plain text, which means anyone intercepting the connection can read or modify the data. HTTPS encrypts this communication so the information stays private and intact during transmission.
Search engines heavily prioritize HTTPS because it creates a safer browsing experience. Beyond the security benefits, HTTPS also serves as a trust signal that influences how both search engines and users perceive your website.
Modern browsers actively warn users when they visit HTTP pages. These warnings typically say something like "Not Secure" in the address bar, which immediately raises red flags for visitors. When people see security warnings, they often leave immediately, which drives up your bounce rate and destroys trust before anyone even reads your content.
Many browser features and APIs only function properly on HTTPS connections. This includes geolocation services, camera access, service workers, and various modern web capabilities. If you're building any kind of interactive or advanced functionality, HTTP creates technical limitations that HTTPS eliminates.
Running on HTTP also creates duplicate content problems when both HTTP and HTTPS versions get crawled separately. Search engines might index both versions, which splits your ranking signals and creates confusion about which version should rank.
Moving from HTTP to HTTPS
The migration process involves several steps that need to happen in the right order to avoid breaking your site or losing rankings during the transition.
First, install a valid SSL certificate on your server. This certificate enables the HTTPS protocol and tells browsers that your site's identity has been verified. Many hosting providers now include free SSL certificates through Let's Encrypt, making this step much easier than it used to be.
Next, update your website configuration so all internal links point to HTTPS URLs. This includes navigation menus, footer links, images, stylesheets, scripts, and any other internal references. Mixing HTTP and HTTPS resources creates mixed content warnings that browsers flag as security issues.
Then, update your canonical tags and sitemaps to reference only HTTPS versions of pages. This tells search engines which version you consider authoritative and prevents them from treating HTTP and HTTPS as separate pages.
Finally, configure server-level redirects so every HTTP page automatically redirects to its HTTPS equivalent. This ensures anyone accessing old HTTP URLs gets seamlessly redirected to the secure version without encountering errors or broken pages.
How to Redirect HTTP to HTTPS Properly
Redirects need to be permanent and specific to maintain your SEO value during the migration. The redirect should work like this: when someone requests http://valpha-search.vercel.app/multisite-information/, they automatically get redirected to https://valpha-search.vercel.app/multisite-information/.
Use 301 redirects specifically, which signal a permanent move. This redirect type passes ranking signals from the old URL to the new one, preserving your SEO value. Other redirect types like 302 suggest temporary moves and don't transfer ranking signals properly.
Make sure each page redirects to its exact HTTPS equivalent rather than sending all HTTP traffic to your homepage. Page-level redirects preserve the user experience and maintain proper URL mapping so inbound links continue working correctly.
Avoid redirect chains where HTTP redirects to another URL before finally reaching the HTTPS version. Each additional redirect adds latency and increases the chance of errors. Go directly from HTTP to HTTPS in a single redirect hop.
After implementing redirects, test them thoroughly to ensure there are no loops, broken paths, or pages that redirect incorrectly. Check both common pages and edge cases like paginated URLs, filtered pages, and deep internal pages.
Maintaining HTTPS After Migration
Once your site runs on HTTPS, you need to maintain consistency across all technical elements. Update all internal links throughout your content to use HTTPS URLs. Even though redirects handle HTTP requests, using HTTPS URLs directly avoids unnecessary redirect hops that slow down page loading.
Make sure canonical tags consistently reference HTTPS versions. Update your XML sitemap to list only HTTPS URLs so search engines prioritize crawling the secure versions. Ensure all external resources like images, scripts, fonts, and third-party embeds also load through HTTPS to avoid mixed content warnings.
Monitor your crawl reports in Google Search Console to confirm search engines are primarily indexing HTTPS versions rather than lingering HTTP pages. If you notice HTTP URLs still appearing in the index weeks after migration, there might be internal links or sitemaps still pointing to HTTP versions.
Meta Robots Tag: Telling Search Engines What to Index
What is the meta robots tag and how does it work?
The meta robots tag is a small instruction you place in the head section of a webpage. It tells search engines whether they should index that page and whether they should follow the links on it. When a page doesn't have a meta robots tag at all, Googlebot assumes the default: index and follow, which is what you want for most pages.
So lacking a meta robots tag isn't inherently a problem. But the issue comes when your site has pages that should NOT be indexed, and those pages either have no tag or have the wrong one. Pages like admin login screens, password reset flows, internal search results, checkout and cart pages, and filter pages don't need to be in search results. Including them wastes your crawl budget and dilutes the quality signals across your site.
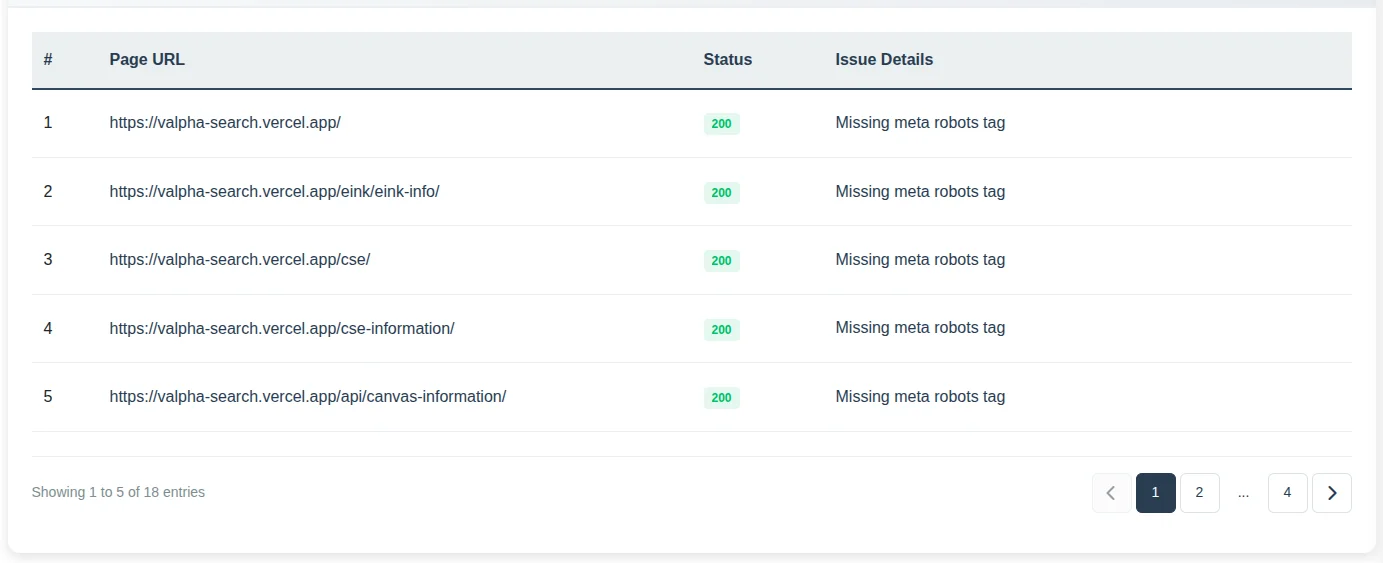
To find issues related to the meta robots tag, run an audit in the SEO Analyzer Pro tool by submitting your website URL. In the dashboard, you will get a list of pages missing a meta robots tag. Use that list as a starting point to review which of those pages actually need indexing and which ones should be restricted.
How to handle meta robots tags across your website
The most common directives you will actually use in practice come down to a few combinations:
index, follow is the default. Search engines can index the page and follow links from it. Most pages should behave this way.
<meta name="robots" content="index, follow">noindex, follow tells search engines not to show the page in results but still allows them to follow links on it. This is the right choice for utility pages like thank-you pages or filter pages that you don't want indexed but whose internal links you still want crawled.
<meta name="robots" content="noindex, follow">noindex, nofollow is the strongest restriction. The page won't be indexed and its links will be ignored. Use this sparingly, only when both the page and its links are completely irrelevant to search.
<meta name="robots" content="noindex, nofollow">There are a few other directives worth knowing: noarchive prevents a cached version from showing in results (mostly irrelevant for Google now), nosnippet stops the description snippet from appearing, and noimageindex prevents images on the page from showing in image search. You can also combine them when needed.
<meta name="robots" content="noindex, follow, noarchive">In real sites, the vast majority of pages should be index, follow. Noindex is reserved for pages with no search value.
How to Handle Meta Robots in CMS Websites
Most content management systems provide built-in SEO controls that let you manage meta robots settings without touching code directly. The key is setting sensible defaults and then adjusting specific pages as needed.
Your default setting should allow indexing and link following for normal content pages. This ensures new blog posts, product pages, and landing pages automatically become indexable when published without requiring manual configuration each time.
Pages like thank you pages after form submissions, internal search result pages, filtered product views, login pages, user account dashboards, and cart pages should typically be set to noindex. These pages exist for functionality but don't provide value in search results and waste crawl budget if indexed.
Use your CMS's SEO settings or plugins to toggle noindex on individual pages rather than manually editing HTML code. Most modern platforms make this a simple checkbox or dropdown selection in the page editor.
After making changes, verify that important content pages haven't been accidentally marked noindex in your SEO settings. This happens more often than you'd think, especially after installing new plugins or themes that come with their own default SEO configurations.
How to Handle Meta Robots in Custom Websites
Custom built websites should implement meta robots through template logic rather than hardcoding tags on every individual page. This keeps the configuration centralized and reduces the risk of mistakes when new pages are created.
The default behavior should be index, follow, ensuring that newly created pages are eligible for indexing without requiring developers to manually add the tag each time. This default should apply to blog posts, product pages, landing pages, and other content intended to appear in search results.
Rather than automatically assigning directives based on page type, the website should provide controls within the admin panel or page settings. This allows administrators to define robots directives for individual pages when necessary, such as setting a page to noindex or nofollow.
This setup keeps things flexible while still maintaining consistent robots behavior across the site. Most pages follow a sensible default, and if a specific page needs different instructions, you can simply override it from the admin interface. It makes SEO decisions much easier to manage without depending on rigid template rules.
Which Pages Should Not Be Followed
Most pages should allow link following even when they're not indexed themselves. The "noindex, follow" combination is far more common than "noindex, nofollow" because links on utility pages often point to valuable content pages that should be discovered and crawled.
Use "noindex, follow" when a page shouldn't appear in search results but its links remain valuable for crawler discovery. This applies to most filtered views, internal search results, thank you pages, and similar utility pages.
Only use "noindex, nofollow" when both the page and all its links should be ignored by crawlers. This is rare because even utility pages typically link to your main navigation and important content pages.
Avoid using nofollow widely across your site because it blocks valuable link discovery paths that help crawlers find and understand your content hierarchy.
In practice, the safest default setup is "index, follow" for content pages and "noindex, follow" for utility pages. This keeps your site fully crawlable while preventing low-value pages from appearing in search results.
Canonical Tags and Duplicate Content Management
Canonical tags tell search engines which version of a page should be treated as the primary one when multiple URLs contain the same or very similar content. This solves a common problem where a single piece of content becomes accessible through different URL patterns, potentially splitting ranking signals across multiple versions.
The canonical tag goes inside the head section of your HTML and specifies which URL should be considered the authoritative version.
Understanding Canonical Tags Through Examples
Let me show you a practical example from the valpha-search site. Suppose there's a page explaining how the Multisite Viewer feature lets users research and monitor multiple websites in one place.
The main page URL might be:
https://valpha-search.vercel.app/multisite-information/But the same content might also become accessible through an alternate URL structure, perhaps through a features subdirectory:
https://valpha-search.vercel.app/features/multisite-information/Both URLs display identical information about researching multiple sites, comparing information across different sources, and browsing various websites in one interface. Search engines might treat these as two separate pages with duplicate content, which splits ranking signals between them instead of consolidating authority in one place.
The canonical tag fixes this by telling search engines which version is the primary one.
The main version should include a self-referencing canonical tag:
<link rel="canonical" href="https://valpha-search.vercel.app/multisite-information/">The duplicate version should point to the main page:
<link rel="canonical" href="https://valpha-search.vercel.app/multisite-information/">This setup ensures search engines treat the main URL as the preferred version, duplicate versions pass their ranking signals to the main page, only the main version appears in search results, and crawlers don't waste resources indexing duplicate content.
Finding Canonical Tag Issues
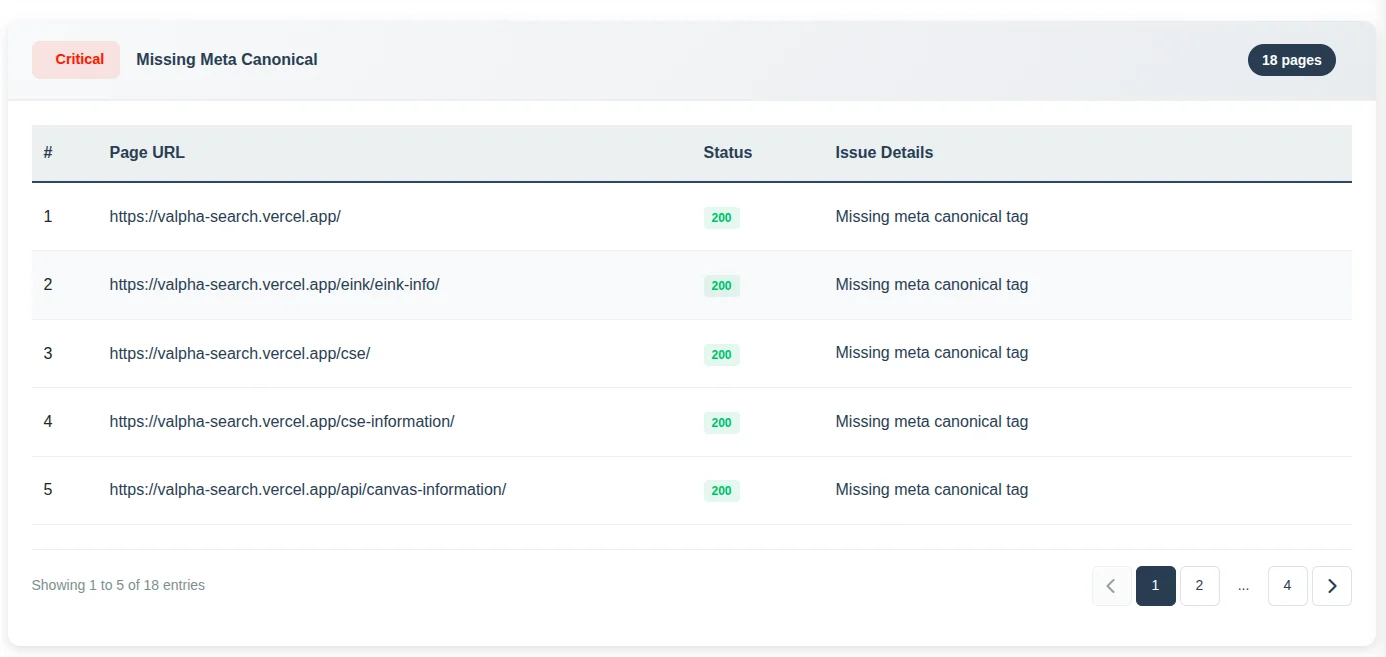
Inside SEO Analyzer Pro, check the issues section for pages missing canonical tags. A missing canonical tag isn't automatically a problem, but it becomes one when your site structure creates multiple paths to the same content.
If your site has URL parameters, category paths, sorting options, filter combinations, or other variations that create duplicate content, you should specify canonical tags explicitly rather than letting Google choose the canonical version on its own. Google usually makes reasonable choices, but sometimes it picks a version you don't prefer, which can cause ranking and analytics issues.
How to Fix Canonical Tag Problems
Canonical issues typically happen when search engines encounter multiple URLs with similar content but receive unclear signals about which one matters most. Fixing them requires identifying the preferred version of each page and ensuring all duplicates point to it clearly.
Start by identifying pages with multiple URL versions. These often come from parameter URLs, category paths, alternate navigation routes, or tracking links. Decide which URL should be the main version before applying canonical tags.
Make sure the canonical tag always points directly to the final preferred URL.
Verify that canonical URLs return normal, accessible page responses. If the canonical page is broken, blocked by robots.txt, or returns an error, search engines will likely ignore the canonical instruction because the target doesn't exist or isn't accessible.
Check that internal links, navigation menus, and sitemap URLs all use the same preferred URL. Mixed signals weaken the canonical signal because search engines receive conflicting information about which version you consider primary.
Handling Canonicals in CMS Websites
Most CMS platforms automatically generate canonical tags for content pages. However, these systems also create duplicate URLs through categories, tags, filters, sorting options, and parameter-based navigation. Your job is verifying that the automatically generated canonicals correctly point to the intended main page.
Confirm that every main content page includes a self-referencing canonical tag pointing to its own clean URL. This reinforces to search engines that the current page is the preferred version rather than a duplicate of something else.
Review pages accessible through multiple paths, such as blog posts appearing under different category URLs. Ensure all alternate versions use canonical tags pointing to the primary page URL rather than creating separate indexed versions.
If your CMS creates URLs with filters or parameters for product catalogs or search results, make sure those versions either reference the main page through canonical tags or get blocked from indexing entirely through noindex tags.
After installing themes, plugins, or making template changes, recheck canonical tags to ensure they still generate correctly across different page types. Plugin conflicts or theme updates sometimes break canonical generation without obvious symptoms.
Handling Canonicals in Custom Websites
Canonical tags should be generated programmatically at the template or backend level instead of being manually inserted on individual pages. This ensures every page consistently outputs a canonical URL and prevents mistakes when new pages are created.
The canonical URL should always be derived from the single primary URL stored in your routing or database layer, not from the current request URL. Generating canonical tags from the request URL can cause duplicate pages to incorrectly reference themselves as canonical.
For example, if the same page is accessible through multiple URLs such as:
/product/shoes
/product/shoes?ref=ads
/product?id=25
all variations should output the same canonical tag:
<link rel="canonical" href="https://example.com/product/shoes">Only the primary clean URL should be allowed to self reference as canonical. Any alternate or parameter based versions must reference that primary URL instead of themselves.
When implementing this logic, canonical generation should follow these rules:
- Use the canonical URL stored in your system rather than the requested URL.
- Parameter URLs must canonicalize to the base page URL.
- Alternate routing paths or aliases must canonicalize to the primary page URL.
- Self referencing canonicals should only appear on the primary version of the page.
- All canonical URLs must use the preferred domain and protocol such as HTTPS and either www or non www depending on your configuration.
By enforcing canonical logic at the template or backend level, every page automatically outputs the correct canonical URL and duplicate variations cannot accidentally declare themselves as the canonical version.
Robots.txt and Crawl Management
A robots.txt file is a simple text file placed at your website's root that gives instructions to web crawlers about which parts of your site they should or shouldn't crawl. When a crawler visits your website, it typically checks robots.txt first to understand these rules before accessing any content.
The file lives at a standard location:
https://valpha-search.vercel.app/robots.txtThe instructions inside tell crawlers which folders, pages, or URL patterns they should avoid crawling. This doesn't directly control indexing, but rather guides how crawlers spend their time and resources on your site.
Why Robots.txt Matters
Search engines don't have unlimited resources for crawling every website. They allocate a certain amount of crawl budget to each site based on factors like site authority, freshness, and overall quality. The robots.txt file helps you direct that crawl budget toward important pages instead of wasting it on low-value areas.
Preventing crawlers from accessing internal search pages, filter combinations, and temporary URLs ensures they focus on content that actually matters for search rankings. This is especially important for large sites where crawl budget becomes a limiting factor.
Reducing unnecessary crawling of areas like admin panels, user account pages, or testing environments protects server resources and keeps crawlers focused on public-facing content. These pages need to exist for functionality but provide zero value when crawled by search engines.
On large sites with heavy dynamic content generation, limiting crawler access to resource-intensive URLs prevents server overload and ensures consistent site performance even during heavy crawl periods.
Common Scenarios Requiring Robots.txt
Modern websites generate many URLs that should exist for users but don't need crawler access. Without crawl control, bots might repeatedly crawl thousands of unnecessary URLs, wasting both crawl budget and server resources.
E-commerce sites with faceted navigation create massive numbers of URL combinations through filters for price, size, color, brand, ratings, and sorting options. Allowing crawlers to access all these combinations wastes crawl budget on pages that are essentially duplicates of main category pages with different sorting or filtering applied.
Internal search result pages generate new URLs every time someone searches your site. These pages typically contain thin or repetitive content and create endless low-value crawl paths that provide no benefit in search results.
Login pages, shopping cart pages, checkout processes, and user account dashboards exist for functionality but shouldn't be crawled. They don't contain content that benefits from appearing in search results and often include session-specific or personalized information that changes per user.
Development or staging directories sometimes remain accessible on production servers. If crawlers access these areas, they might index unfinished or duplicate versions of your site, creating confusion and duplicate content issues.
Important Realities About Robots.txt
Robots.txt only provides guidance to compliant crawlers. It doesn't enforce actual access control like password protection or server-level blocking would.
Well-behaved search engines like Google and Bing respect robots.txt rules and follow them properly. However, malicious crawlers, poorly configured bots, or aggressive scrapers might ignore the file completely and crawl everything anyway.
Pages blocked in robots.txt can still appear in search results if other websites link to them. Google might index the URL based on external links even if it can't crawl the page content. The search result would show the URL with limited information but no snippet since Google couldn't access the page.
Because of these limitations, never use robots.txt to protect sensitive data. It's not a security mechanism and provides no actual access prevention. Use proper authentication and server-level restrictions for protecting confidential content.
Best Practices for Robots.txt
A well-configured robots.txt file focuses on crawl efficiency while keeping important content accessible to search engines.
Only block pages that genuinely waste crawl resources or provide no search value. Blocking too aggressively can accidentally hide important content from search engines and hurt your rankings.
Avoid blocking pages that should appear in search results. If a page needs to stay out of the index, a noindex meta tag is the proper solution rather than robots.txt blocking, because crawlers need to access the page to see the noindex instruction.
Keep rules simple and readable so you can audit them later without confusion. Overly complex robots.txt files with hundreds of rules become difficult to maintain and often contain accidental blocks that hurt site visibility.
Ensure the robots.txt file itself is accessible and returns a normal 200 status code. If the file is unavailable or returns errors, crawlers may assume everything is allowed, which defeats the purpose of having crawl controls.
Regularly review the file when your site structure changes. New sections, features, or page types might need updated crawl rules to ensure proper resource management.
Common Robots.txt Mistakes
Several common mistakes can severely impact how search engines crawl and index your site.
Blocking important sections by mistake prevents search engines from crawling pages that should rank. This often happens when copying robots.txt rules from another project without adjusting them for your specific site structure.
Using robots.txt to hide sensitive content like private documents or admin areas only discourages crawling but doesn't prevent direct access. Anyone with the URL can still access the content directly, making this a false sense of security.
Blocking a page in robots.txt while also adding a noindex tag creates a conflict. Search engines must be able to crawl a page in order to see and process the noindex instruction. If robots.txt prevents crawlers from accessing the page, they cannot read the noindex tag. However, search engines can still discover blocked URLs through external links, sitemaps, or other references on the web. When this happens, the search engine may add the URL to its index based only on the link signals it sees, even though it has never crawled the page content. In these cases, the page can appear in search results as a URL only listing with little or no information because the crawler was blocked from accessing the page itself. To ensure that a page is properly removed from search results, it should not be blocked in robots.txt. Instead, allow search engines to crawl the page and include a noindex directive in the page's HTML or HTTP header so the crawler can read and process the instruction. Robots.txt should only be used when the goal is to prevent crawling. If the goal is to prevent indexing, the page must remain accessible to crawlers so the noindex directive can be detected.
Leaving development blocks in production robots.txt files sometimes blocks the entire site from crawling. This happens when developers add aggressive blocks for testing and forget to remove them before launch.
Blocking JavaScript or CSS files required for rendering prevents search engines from properly understanding page layout and content. Modern crawlers need access to these resources to render pages the way real users see them.
XML Sitemaps and Content Discovery
Crawlers from Google and Bing discover pages primarily through following internal links throughout your website. But this discovery process has limitations and inefficiencies. Some pages sit deep in your URL structure and take many clicks to reach. Others might be poorly linked from main navigation areas. Some pages might even be orphaned, existing on your server but not linked from anywhere else on the site.
Sitemaps solve these discovery problems. An XML sitemap is a structured list of URLs from your website that you explicitly want search engines to discover and crawl. The file uses XML format and typically lives at your domain root:
https://valpha-search.vercel.app/sitemap.xmlSitemap gives search engines a direct map of your important pages rather than forcing them to discover everything through crawling and link following. This helps them understand what pages exist, which ones matter most, and how often they might change.
A sitemap doesn't guarantee indexing. Its job is discovery and crawl guidance. It makes sure search engines know your pages exist, especially when your site structure is large, new, or complex enough that natural link discovery might miss important content.
Why Sitemaps Matter
The main purpose of an XML sitemap is helping search engines find and crawl pages more efficiently. While search engines can discover content through links, that process isn't perfect or complete.
Some pages might be buried deep in your site structure or only accessible through specific navigation paths, filters, or pagination. A sitemap ensures those URLs remain visible to search engines even if they're difficult to reach through normal crawling patterns.
Another critical benefit is speed of discovery. When you publish new content, including it in your sitemap helps search engines notice it sooner rather than waiting for crawlers to eventually find the page through links. This matters most for blogs, news websites, e-commerce catalogs, and any platform where new content appears regularly.
Sitemaps also help search engines understand your site's structure and scale. The file provides signals about update frequency and helps prioritize crawling important pages over less important ones.
Why Every Website Should Have a Sitemap
Even though search engines can crawl websites without sitemaps, relying solely on natural link discovery is not ideal. For small websites with only a few pages, the difference might be minimal. But as a website grows, a sitemap becomes extremely valuable for ensuring that newly published pages, recently updated content, and pages located deeper within the site structure are discovered quickly.
Websites that benefit the most from sitemaps include ecommerce stores with thousands of product pages, large content websites with hundreds or thousands of articles, platforms that frequently publish new content such as blogs or news portals, and websites with weak internal linking where some pages might not be easily reachable through normal navigation.
In simple terms, a sitemap acts as a reliable content discovery layer that complements normal crawling rather than replacing it.
Example of a Simple XML Sitemap
A typical XML sitemap looks like this:
<?xml version="1.0" encoding="UTF-8"?>
<urlset xmlns="http://www.sitemaps.org/schemas/sitemap/0.9">

  <url>
    <loc>https://example.com/</loc>
    <lastmod>2026-03-01</lastmod>
    <changefreq>weekly</changefreq>
    <priority>1.0</priority>
  </url>

  <url>
    <loc>https://example.com/blog/seo-guide</loc>
    <lastmod>2026-02-25</lastmod>
    <changefreq>monthly</changefreq>
    <priority>0.8</priority>
  </url>

  <url>
    <loc>https://example.com/product/shoes</loc>
    <lastmod>2026-03-02</lastmod>
    <changefreq>weekly</changefreq>
    <priority>0.9</priority>
  </url>

</urlset>
Each <url> block represents a page on your website and provides additional information that helps search engines understand how that page fits within your site.
Explanation of Sitemap Properties
<loc>
This is the most important field and contains the full canonical URL of the page. Search engines use this to discover the page and add it to their crawl queue. Every sitemap entry must include this tag.
Example:
https://example.com/blog/seo-guideThe URL should always use the correct protocol and preferred domain version such as HTTPS and either www or non www depending on your configuration.
<lastmod>
This tag tells search engines when the page was last modified. It helps crawlers determine whether a page needs to be recrawled to detect updates.
Example:
2026-03-01This value should only be updated when the page content actually changes. Updating it without real changes can reduce its usefulness for search engines.
<changefreq>
This tag suggests how frequently the page content is likely to change.
Common values include:
always
hourly
daily
weekly
monthly
yearly
never
This is only a hint for search engines, not a command. Search engines may ignore it if the actual crawl patterns suggest something different.
<priority>
This value indicates the relative importance of a page compared to other pages on the same site. The value ranges from 0.0 to 1.0.
Example:
1.0  homepage
0.8  important content pages
0.5  regular pages
This does not affect rankings directly. It only helps search engines understand which pages might deserve more crawl attention relative to others on your website.
Submitting Sitemaps to Search Engines
Once your sitemap exists, submit it to search engines so they can start using it for discovery and crawl prioritization.
Submitting to Google Search Console:
Open Google Search Console and select your website property. In the left sidebar, navigate to the Sitemaps section. You'll see a field asking for the sitemap URL. Enter your sitemap path, usually just "sitemap.xml" since it's at the root directory. Click Submit and Google will process the sitemap and begin reading the URLs inside it.
Over time you will see data showing discovered pages, indexed pages, and possible errors or warnings about specific URLs in the sitemap.
Submitting to Bing Webmaster Tools:
The process in Bing Webmaster Tools works similarly. Open your website dashboard and navigate to the Sitemaps section. Enter your full sitemap URL such as "https://valpha-search.vercel.app/sitemap.xml" and click submit. Bing will start processing the sitemap immediately.
While Bing can find sitemaps automatically through robots.txt references, manually submitting ensures the search engine sees it immediately rather than waiting for automated discovery.
Keeping Sitemaps Updated
A sitemap only works effectively if it stays current. Many websites create a sitemap once during launch and never update it again, which defeats the entire purpose as the site grows and changes.
The best approach is automatic sitemap generation rather than manual maintenance. Most modern CMS platforms like WordPress, Shopify, and others automatically update the sitemap when new content gets published. If you're running a custom website, your backend should generate sitemap entries dynamically whenever new pages or articles get created.
Also ensure your sitemap only includes indexable URLs. If you add a new page but block it through robots.txt or noindex tags, search engines will ignore it even if it appears in the sitemap. This creates unnecessary noise and reduces trust in your sitemap over time.
Sitemap Indexes for Large Websites
When a website contains thousands of pages, putting everything into a single sitemap file becomes inefficient and eventually impossible. Search engines limit sitemap size to 50,000 URLs or 50MB file size, whichever comes first.
Large websites solve this using multiple smaller sitemaps called subsitemaps. Instead of one massive file, the structure typically looks like this:
sitemap.xml
sitemap-posts.xml
sitemap-pages.xml
sitemap-products.xml
sitemap-categories.xml
The main sitemap.xml acts as a sitemap index file that lists all subsitemaps. This creates a hierarchical structure:
sitemap.xml
   ├── sitemap-posts.xml
   ├── sitemap-products.xml
   ├── sitemap-pages.xml
This organization makes crawling more organized and scalable. Search engines can process each section independently without downloading a massive file that might time out or cause processing errors.
Large e-commerce stores, directories, news websites, and content platforms with thousands of URLs almost always use sitemap indexes to manage their content discovery efficiently.
Sitemap Best Practices
Include Only Valuable Pages: Your sitemap should contain pages you actually want indexed, not every URL your site generates. Many people mistakenly include tag pages, filtered views, duplicate URLs, parameter variations, or low-quality pages that waste crawl budget.
Search engines treat sitemap URLs as signals about what matters on your site. Including hundreds of low-value pages dilutes overall quality signals. Focus on pages that provide real value like main content articles, product pages, important landing pages, and core category pages.
Keep Sitemaps Automatically Updated: A sitemap that doesn't update regularly becomes outdated quickly. If search engines encounter removed pages, redirected URLs, or missing content repeatedly, they may start ignoring your sitemap signals altogether.
Automating sitemap updates ensures new pages appear immediately and removed pages disappear automatically. This keeps the sitemap clean, trustworthy, and useful for search engines.
Ensure All URLs Return 200 Status Codes: Every URL listed in your sitemap should load correctly with a 200 OK status code. If URLs return 404 errors, redirect to other pages, or produce server errors, it sends mixed signals to search engines and wastes crawl resources.
Regularly audit your sitemap to ensure all listed pages work properly and return expected responses.
Include Only Canonical Versions: If your website has multiple versions of the same URL, your sitemap should include only the canonical version. For example, if these variations exist:
example.com/page
example.com/page/
example.com/page?ref=abc
Your sitemap should include only the canonical URL. This avoids duplicate indexing confusion and helps search engines understand which version you consider authoritative.
Keep Sitemaps Clean and Structured: Sitemaps should remain simple and well-organized. Avoid adding unnecessary parameters, tracking links, session IDs, or dynamically generated duplicate URLs.
In my experience large websites usually benefit from separating sitemaps by content type such as blog posts, products, or categories. This keeps individual files smaller and easier for search engines to process efficiently.
CDN Implementation for Performance
Content delivery networks don't get mentioned often in technical SEO discussions because they don't directly affect ranking or indexing mechanics. However, when you're doing comprehensive technical optimization, understanding CDNs and their performance benefits is valuable enough that I have included them in this guide.
First, let me explain what happens normally when you are not using a CDN.
Imagine someone in Germany opening a website hosted on a single server in the United States. When that visitor loads the page, their browser requests every file directly from that distant server. The HTML file, images, CSS files, JavaScript, fonts, everything comes from the same physical location. Because the distance between the visitor and server is large, each request takes longer to travel back and forth across the internet.
Now multiply that by dozens of requests needed to load a modern webpage. Each image, script, and stylesheet adds another round trip across thousands of miles. The result is the page loads noticeably slower for users far from the server location.
Traffic spikes make this worse. If thousands of users hit the same server simultaneously, it can become overloaded. Pages start loading slowly, requests fail, or the site temporarily becomes unavailable.
This is the problem a CDN is designed to solve.
What is a CDN
A Content Delivery Network is a distributed network of servers placed in different geographic locations around the world. Instead of serving website content from a single origin server, a CDN stores copies of certain files on multiple servers positioned closer to users.
When someone visits your website, the CDN automatically serves content from the server geographically closest to them. This reduces the distance data needs to travel and improves loading speed significantly. In our previous example, after adding a CDN to your website, a visitor from Germany would receive website assets from a CDN node located in Germany, which is much faster than fetching those assets directly from the origin server in the USA.
Most CDNs primarily cache static files like images, CSS, JavaScript, videos, fonts, and sometimes full HTML pages. The original server remains the main source of truth, but the CDN handles delivering cached content to visitors.
How CDN Helps Your Website
The biggest improvement a CDN brings is reduced latency, which translates to faster loading times for visitors around the world.
When files are served from a nearby CDN server, the time needed for data to travel across long distances is drastically reduced. Instead of every user requesting files from a single central server, they receive them from the closest available node in the CDN network.
Another major benefit is reduced load on your main server. Since many requests get handled by CDN servers, your origin server doesn't need to process every single request. This improves stability and allows the website to handle higher traffic volumes without slowing down or crashing.
Benefits of using CDN
Although we have already mentioned the benefits of a CDN throughout this section, it is still useful to explore them again in more detail to better understand how they improve website performance and reliability.
Faster Loading for Global Users: One of the most noticeable benefits is improved page speed, especially for international visitors. A user located far from your hosting server no longer needs to fetch every file from that distant location. Instead, the CDN delivers content from a nearby node, which significantly reduces loading time.
For websites with global audiences, this difference becomes meaningful. Pages that would normally take several seconds to load can become noticeably faster, improving user experience and reducing bounce rates.
Reduced Server Load: When a CDN caches images, scripts, stylesheets, and other assets, those requests no longer hit your main server. This reduces CPU usage, bandwidth consumption, and overall strain on your hosting infrastructure.
During traffic spikes or viral content moments, this can prevent your server from crashing or slowing down. The CDN absorbs a large portion of incoming requests, distributing the load across multiple servers instead of overwhelming a single machine.
Better Handling of Traffic Spikes: Websites sometimes experience sudden bursts of traffic from social media, marketing campaigns, news coverage, or viral content. Without a CDN, a single server might struggle to handle the sudden surge and could become slow or unresponsive.
CDNs distribute traffic across many servers worldwide. Instead of overwhelming one machine, requests get spread across the network, allowing the site to stay responsive even during peak periods.
Improved Security: Many modern CDNs include built-in security features like DDoS protection, bot filtering, and Web Application Firewall capabilities. These systems can block malicious traffic before it reaches your origin server.
While a CDN isn't a complete security solution, it adds a protective layer that reduces many common threats like distributed denial of service attacks and malicious bots.
Bandwidth Savings: Because cached files are served from CDN nodes instead of the origin server, your hosting server sends less data overall. This reduces bandwidth usage and can lower hosting costs, especially for media-heavy websites.
For sites serving large images, downloadable files, or videos, this benefit becomes quite significant over time.
CDN Disadvantages
While a CDN offers many benefits, it also has some drawbacks that can become noticeable in certain situations. It is important to be aware of these limitations, which we will explore in the following points.
Additional Cost: While many CDNs offer free tiers, advanced features or large traffic volumes often require paid plans. You should evaluate whether the performance improvement is worth the expense based on your traffic patterns and audience location.
Cache Management Challenges: One common challenge with CDNs is dealing with caching behavior. Since a CDN stores cached copies of your files on multiple servers across different locations, updates made on your origin server don't always appear instantly everywhere.
If cache duration is set too long, visitors may continue seeing an older version of a page, image, or script even after you've updated it. This creates confusion, especially when changes are important like price updates, product availability, or corrected information.
Cache management becomes an important part of using a CDN. Many services allow you to manually clear cached files through a process called cache purging or cache invalidation. When you purge the cache, the CDN removes stored copies and fetches the latest version from the origin server the next time someone requests that file.
Without proper cache rules and purging strategies, websites can end up serving outdated content longer than intended.
Not Everything Can Be Cached: CDNs work best with static files like images, CSS files, JavaScript, fonts, and videos because these files usually remain the same for every visitor. However, many parts of websites are dynamic and change depending on the user or situation.
For Examples logged-in dashboards, personalized recommendations, shopping carts, account settings, or real-time data like stock availability differs from user to user. Because this content is generated dynamically for each request, it often can't be cached the same way static assets can.
If a CDN cached such pages incorrectly, users might see someone else's account information or outdated personalized data. For this reason, these requests usually bypass the CDN cache and go directly to the origin server.
The CDN still helps by delivering static resources quickly, but the main page generation still happens on the original server to ensure accurate and personalized responses.
Popular CDN Providers
Several CDN services are widely used across the internet, each with different strengths and pricing models.
Cloudflare is one of the most popular options because it combines CDN, security, and performance features in a single platform. It's widely used by small websites as well as large enterprises.
Akamai is one of the oldest and largest CDN providers and powers delivery infrastructure for many major companies and streaming platforms.
Amazon CloudFront is part of the AWS ecosystem and integrates well with other Amazon services. It's commonly used by applications already hosted on AWS.
Fastly focuses heavily on performance and real-time caching control. It's popular among large websites and technology companies that need fine-grained control over cache behavior.
KeyCDN and Bunny.net are well known for offering affordable CDN services with good performance, making them popular choices for smaller websites and growing businesses.
Each CDN differs in pricing models, geographic coverage, feature sets, and integration complexity, so the best choice often depends on your specific website type and infrastructure.
What to Keep in Mind When Using a CDN
Understand What Should Be Cached: Not every file should be cached in the same way. Static assets like images, CSS, and JavaScript are usually safe to cache for longer periods. However, frequently changing pages may need shorter cache durations or should bypass caching entirely.
Planning cache policies carefully helps balance performance improvements with content freshness.
Monitor Cache Performance: After implementing a CDN, monitor metrics like cache hit rate. A high cache hit rate means most requests are being served by the CDN rather than the origin server, which is the goal.
If the cache hit rate is low, it often means caching rules aren't configured properly and you're not getting the full benefit of the CDN.
Keep Origin Server Optimized: A CDN improves delivery speed, but it doesn't fix underlying performance problems on the origin server. If your server is slow or poorly configured, users may still experience delays when uncached requests reach the origin.
Optimizing hosting, database queries, and backend performance remains important even with a CDN in place.
Plan for Cache Purging: Whenever content updates frequently, you need a strategy for clearing outdated cache. Many CDNs provide tools or APIs for cache purging so updated files are delivered immediately after changes.
Without this capability, users might continue seeing old versions of pages or assets, which creates confusion and potentially displays incorrect information.
Page Speed and Core Web Vitals Optimization
You already know that your website needs to be fast. Now we will look at how to make that happen.
Website page speed optimisation is the process of improving how quickly a webpage loads and becomes usable for visitors. When someone opens a page, multiple elements must load including images, scripts, fonts, stylesheets, and other resources. If these elements aren't optimised properly, the page may take several seconds to load, which frustrates visitors and causes them to leave before interacting with your content.
Page speed optimisation focuses on reducing loading time, improving server response, optimising assets, and ensuring users can start interacting with the page as quickly as possible. A faster website improves user experience and also plays a direct role in search engine rankings. Search engines prioritise websites that provide smooth and fast browsing experiences because it helps users access information quickly and reliably.
For businesses, page speed has a direct impact on conversions, engagement, and overall website performance. Even a small delay of a few seconds can reduce user engagement and increase bounce rates. Because of this, optimising page speed has become essential for both technical SEO and website performance management.
What are Core Web Vitals
See, website loading speed is important, but just because your website loads within seconds does not mean it has become interactive and usable for the user. Sometimes after the page loads, it still takes a while for elements to appear, buttons to respond, and the layout to fully settle. This is why having a good post load experience is also important.
Core Web Vitals are a set of performance metrics introduced by Google to measure the real user experience of a webpage. These metrics focus on three main aspects of page performance: loading speed, visual stability, and interactivity.
Google uses Core Web Vitals as part of its ranking signals because they reflect how users actually experience a webpage in real time. If a page loads slowly, shifts content unexpectedly, or takes too long to respond to user actions, it creates a poor experience that Google wants to avoid rewarding with high rankings.
The three main Core Web Vitals metrics include:
Largest Contentful Paint (LCP): This measures how long it takes for the largest visible element on the page to load. Usually this element is a large image, banner, or headline section. Ideally, LCP should occur within 2.5 seconds.
Interaction to Next Paint (INP): This metric evaluates how responsive a page is when users interact with it. For example, clicking a button, opening a menu, or submitting a form should respond quickly. A slow interaction time makes the page feel unresponsive and frustrating.
Cumulative Layout Shift (CLS): CLS measures how stable the page layout remains while it loads. If elements suddenly move around during loading, users may accidentally click the wrong thing or lose their place. A low CLS score means the page layout remains stable and predictable.
Together, these metrics help website owners understand how their pages perform from the user's perspective rather than just technical performance numbers.
Why Core Web Vitals Matter
Core Web Vitals are important because they directly impact both search rankings and user experience. Google considers these metrics as part of its page experience signals, meaning websites that perform well on Core Web Vitals have a better chance of ranking higher in search results.
From a user perspective, slow or unstable websites create frustration. Visitors expect pages to load quickly and respond immediately to their actions. If the page takes too long to display important content or if elements move around while loading, users are more likely to leave the site entirely.
Core Web Vitals matter because they improve search rankings by meeting Google's page experience requirements. They lower bounce rates because visitors stay on fast websites longer. They increase user engagement because people interact more with websites that feel responsive and stable. They boost conversion rates because fast loading pages improve the chances that visitors complete actions like purchases or form submissions. They create better mobile experiences since many users browse from mobile devices where performance matters even more.
How to Improve LCP (Largest Contentful Paint)
Largest Contentful Paint measures how long it takes for the main visible content on a page to load. This is usually the hero image, a large banner, or the main heading section that appears at the top of the page. Google recommends keeping LCP under 2.5 seconds for a good user experience.
When LCP is slow, visitors see a blank or incomplete page for too long. The goal is ensuring the most important visible content loads as quickly as possible.
Optimize Hero Images and Large Media: In most cases, the largest element on the page is an image or banner. If the image is too large or not optimized, it significantly delays LCP.
Compress images before uploading them using tools like TinyPNG or ImageOptim. Use modern image formats like WebP or AVIF which provide better compression than JPEG or PNG. Avoid uploading images much larger than the display size. Use responsive images so mobile users receive smaller files instead of desktop-sized versions and reduce unnecessary high-resolution assets that provide no visible quality improvement.
For example, if the hero image displays at 1200 pixels wide but the uploaded file is 4000 pixels wide, the browser must download a much larger file than needed. Properly resizing the image alone can drastically improve LCP.
Preload Important Page Elements: Browsers normally load resources in a certain order. Sometimes the most important element loads too late because other resources are processed first.
Preloading tells the browser to prioritize critical resources like hero images, key fonts used in the first section, and important stylesheets. This ensures the browser begins downloading these resources immediately instead of waiting until later in the loading process.
Improve Server Response Time: Before a page starts rendering, the browser must receive the first response from the server. If this process is slow, it delays everything else including LCP.
You can improve server response time by using faster hosting infrastructure, enabling server level caching, optimizing database queries, reducing heavy backend processing, and using a content delivery network to distribute content closer to visitors around the world.
A faster server allows the page to begin rendering almost immediately after the request arrives.
Together, these improvements help the server respond more quickly and deliver pages to users with less delay.
Reduce Render-Blocking Resources: CSS and JavaScript files can block page rendering. When the browser encounters these files, it pauses page rendering until the files are downloaded and processed.
To reduce this issue, minify CSS and JavaScript files, remove unused CSS rules, defer non-critical JavaScript, and load scripts after the main content when possible.
Reducing render-blocking resources allows the browser to display the main page content sooner.
Use Lazy Loading for Non-Critical Content: While the main hero content should load immediately, other elements further down the page don't need to load right away.
Lazy loading delays loading of images and videos outside the visible area of the screen. This reduces initial page load size, speeds up loading of visible content, and lowers bandwidth usage.
This allows the browser to prioritize above-the-fold content that contributes to LCP.
How to Improve INP (Interaction to Next Paint)
Interaction to Next Paint measures how quickly a webpage responds when a user interacts with it. This includes clicking buttons, opening menus, submitting forms, or typing into input fields.
A slow interaction response makes the website feel unresponsive even if it loaded quickly. Google recommends keeping INP under 200 milliseconds for a good experience.
Reduce Heavy JavaScript Execution: Large JavaScript files often cause interaction delays because the browser must process them before responding to user input.
Common issues include large JavaScript frameworks, multiple third-party scripts, complex frontend logic, and long-running script tasks.
To improve performance, remove unused JavaScript libraries, split large scripts into smaller chunks, load scripts only when needed, and delay non-critical scripts.
Reducing JavaScript workload allows the browser to respond faster to user actions.
Break Long Tasks into Smaller Processes: Sometimes scripts run long tasks that block the browser for several hundred milliseconds. During this time, the browser cannot respond to user interactions.
Breaking these tasks into smaller operations allows the browser to remain responsive. Process large data sets in smaller batches, delay background tasks, and avoid large synchronous operations.
Shorter tasks improve responsiveness and reduce interaction delays.
Limit Third-Party Scripts: Third-party scripts often add significant processing overhead including advertising scripts, chat widgets, tracking pixels, marketing tools, and social media embeds.
Each script consumes browser resources and may slow down interaction response time. Remove unnecessary integrations, load third-party scripts only when needed, and delay scripts until after the main page loads.
Carefully reviewing these scripts can greatly improve page responsiveness.
Optimize Event Handlers: Interactive elements like buttons and forms rely on event listeners that trigger scripts when users interact with them. If these handlers contain heavy logic or multiple network requests, interaction delays occur.
So, keep event handlers lightweight, avoid heavy calculations during interactions, perform background processing asynchronously, and reduce unnecessary DOM updates.
Efficient event handling ensures that user interactions feel instant.
Reduce DOM Complexity: The Document Object Model, or DOM, represents the structure of a webpage. It is essentially how the browser organizes all the elements on the page such as headings, images, buttons, and containers. When the DOM becomes very large or overly complex, the browser has to work harder to render the page and handle user interactions, which can slow things down.
Pages that contain thousands of elements or deeply nested layouts require more processing whenever something changes on the screen. Even small updates can become expensive because the browser may need to recalculate styles, update layouts, or repaint parts of the page. Keeping the structure clean by removing unnecessary elements, avoiding excessive nesting, and limiting large dynamic updates can significantly reduce this overhead.
A simpler DOM makes it easier for the browser to do its job efficiently. With fewer elements to manage and a cleaner structure, rendering becomes faster and interactions like clicking buttons or updating content feel more responsive to the user.
How to Improve CLS (Cumulative Layout Shift)
Cumulative Layout Shift measures how stable a page layout remains while it loads. If elements suddenly move around during loading, users may accidentally click the wrong buttons or lose their reading position.
Google recommends keeping CLS below 0.1.
Always Define Image and Video Dimensions: One of the most common causes of layout shift is images without defined width and height attributes.
When the browser doesn't know the image size in advance, it can't reserve space for it. Once the image loads, it pushes other content down the page.
Specify width and height attributes for images, use aspect ratio containers for responsive images, and ensure media elements have reserved space before loading.
This allows the browser to allocate space before the content loads.
Reserve Space for Ads and Embedded Content: Advertising blocks and embedded widgets often load after the page begins rendering. When these elements appear suddenly, they push surrounding content and cause layout shifts.
Reserve fixed space for ads, use placeholder containers for embedded widgets, and avoid dynamically inserting elements above existing content.
This ensures the layout remains stable even before the ad or widget loads.
Avoid Inserting Content Above Existing Elements: Sometimes websites dynamically insert new content at the top of the page after it loads. For example, promotional banners, notifications, or cookie consent messages.
If these appear above existing content, they push everything downward. Display banners in reserved containers, show overlays instead of pushing content, and load notifications without shifting page elements.
Optimize Web Font Loading: Web fonts can cause layout shifts if the browser initially displays fallback fonts and later replaces them with custom fonts.
This process is known as a font swap and can cause text to change size or spacing. Use font display settings that reduce layout changes, preload important fonts, and use fallback fonts with similar dimensions.
Avoid Animations that Trigger Layout Changes: Certain animations cause layout recalculations that shift elements across the page.
Instead of animating layout properties like position or size, use properties that don't trigger layout changes. Use transform and opacity animations, avoid animations that modify layout flow, and ensure animated elements don't affect surrounding content.
Common Page Speed Optimization Mistakes you should be aware of
Many website owners attempt to improve page speed but unknowingly make mistakes that limit performance improvements.
Common issues include uploading very large images directly from cameras or design tools without compression, installing too many plugins or extensions that add unnecessary scripts, ignoring mobile performance while optimizing only for desktop, not enabling caching or compression on the server, using heavy page builders without optimization, adding too many third-party widgets and trackers, running multiple analytics or advertising scripts simultaneously, and ignoring Core Web Vitals metrics while focusing only on overall speed scores.
Avoiding these mistakes can already lead to noticeable improvements in website performance.
Page Speed Optimization Best Practices
Maintaining fast website performance requires following a set of consistent best practices. Optimization is not something you do once and forget about. As your website grows, new features, content, and design changes can gradually slow things down, which is why performance should be treated as an ongoing process.
Regularly auditing your website with reliable performance tools helps you identify potential issues early. Pay attention to important metrics such as Core Web Vitals, especially on key pages that receive the most traffic. It is also important to optimize images before uploading them, enable caching and compression on the server, and remove scripts or styles that are no longer needed. Testing performance on both mobile and desktop devices ensures your website delivers a good experience across different environments.
Using SEO Analyzer Pro for Page Speed Analysis
Google provides a tool called PageSpeed Insights that analyzes webpage performance and provides optimization recommendations. It evaluates both mobile and desktop performance and highlights issues that affect loading speed and Core Web Vitals.
One limitation, however, is that PageSpeed Insights analyzes only one page at a time. To check multiple pages, you must manually copy and paste each URL into the tool, run the analysis, and repeat the process for every page you want to review. For larger websites, this quickly becomes tedious and time consuming.
SEO Analyzer Pro streamlines this process by integrating page speed analysis directly into the website audit workflow. After the crawler collects pages from your website, you can simply select any page from the sidebar on the right to view its analysis.
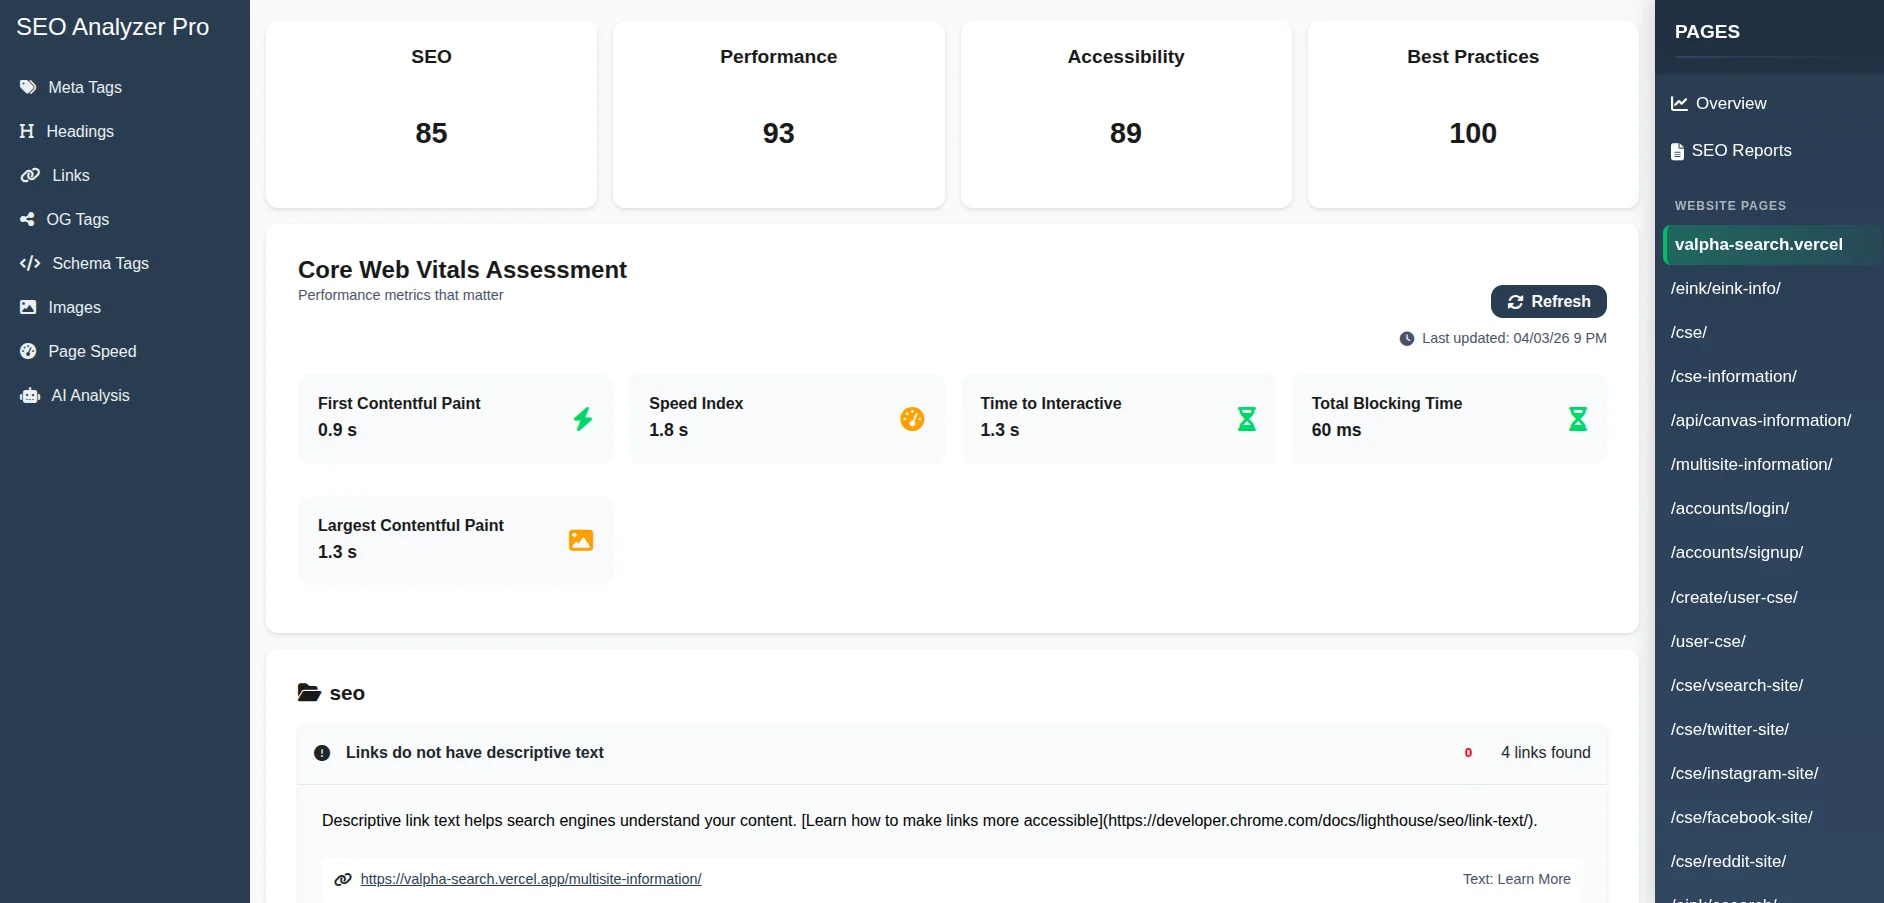
When you click a page, the tool automatically displays that page's detailed performance data, including the same type of insights you would normally see in Google PageSpeed Insights. If you want to review another page, you only need to click its name in the sidebar, and the analysis for that page appears instantly.
The report includes Core Web Vitals metrics, performance scores, loading insights, optimization recommendations, and other technical factors that affect page speed.
This approach removes the need to repeatedly copy and paste URLs into PageSpeed Insights. Instead, you can quickly move between pages and review their performance directly inside the SEO Analyzer Pro interface, making it easier to identify issues and decide which pages need optimization first.
Frequently Asked Questions
What is the difference between crawling and indexing, and why does it matter for SEO?
Crawling is the discovery stage. Search engine bots visit your pages, follow links, and read the content on the page. Indexing is the next step, where the search engine analyzes that page and decides whether it should be added to its index and be eligible to appear in search results.
A page can be crawled without being indexed. Search engines may skip indexing pages that look duplicate, thin, or intentionally excluded with a noindex tag. For SEO, this simply means that being crawled does not guarantee visibility in search results. Only indexed pages can actually show up in Google.
How do I know if my website has duplicate content issues?
Duplicate content problems are often hard to notice because pages look perfectly normal to visitors. The best way to detect them is by running a full site crawl with an SEO audit tool that checks for pages with identical or very similar content. Google Search Console can also reveal duplicates in the Coverage report.
Common causes include URL parameters, HTTP and HTTPS versions of the same page, www and non-www versions, trailing slash differences, or paginated content. Once you identify the duplicates, the usual fixes involve canonical tags, redirects, or adjusting how your CMS generates URLs.
Does page speed actually affect Google rankings directly?
Page speed is a ranking factor, but it is a relatively small one. Google includes speed within its page experience signals, which also cover things like Core Web Vitals, mobile usability, and HTTPS. A fast site does not automatically outrank a slower one if the slower page is more relevant or authoritative.
Where speed matters most is when pages are otherwise very similar. If two pages target the same topic and offer comparable quality, the faster and more stable page can have an advantage. Speed also affects how users interact with a site, since very slow pages often cause visitors to leave before the content even loads.
What should I include in my robots.txt file and what should I never block?
Your robots.txt file should block pages that exist for technical reasons but offer no value in search results. This usually includes admin pages, login areas, internal search result pages, checkout flows, and other system URLs that create unnecessary crawl paths.
What you should never block is just as important. Avoid blocking CSS or JavaScript files because search engines need them to properly render your pages. Also never block pages you actually want indexed. If a page should stay out of search results, use a noindex tag instead so crawlers can still read the instruction.
How long does it take for technical SEO changes to show results in Google?
The timing mostly depends on how quickly Google recrawls your site. Small changes such as fixing a canonical tag or updating a robots directive might show effects within a few days or weeks. Larger structural changes like HTTPS migrations or major URL restructuring can take several weeks or even months to fully settle.
You can speed things up by requesting indexing through Google Search Console or by updating and resubmitting your sitemap. Often the first signs of progress are indirect improvements, such as fewer crawl errors or previously missing pages appearing in the index.
What is crawl budget and does it matter for small websites?
Crawl budget refers to how many pages Googlebot is willing to crawl on your site within a certain timeframe. It depends on how fast Google can crawl your server and how important or frequently updated your pages appear to be.
For most small websites, crawl budget is rarely a real limitation. However, even smaller sites can create problems if they generate thousands of unnecessary URLs through filters, tags, or parameters. Keeping your site structure clean helps search engines focus on the pages that actually matter.
Is an XML sitemap still necessary if my website has good internal linking?
Yes, an XML sitemap is still useful even if your internal linking is strong. Internal links help search engines discover pages naturally, but they do not always guarantee that every page will be found quickly, especially on large sites or pages that are deeper in the structure.
A sitemap also lets you provide extra signals about your pages, such as last modified dates, change frequency, and relative priority. Search engines do not have to follow these hints, but they still give you a way to communicate page importance and update patterns that internal links alone cannot show.
Can I have too many pages in my sitemap?
Technically a sitemap can hold up to fifty thousand URLs, but including every possible page is rarely a good idea. If your sitemap is filled with low value pages like filtered views, tag archives, or duplicate URLs, you weaken the signal about what content actually matters.
The best approach is to treat your sitemap as a curated list of pages you truly want indexed. Include only URLs that return a 200 status code, contain meaningful content, and are not blocked by canonical tags or noindex directives.
What happens to my SEO if I switch domains or change my URL structure?
If you change your URL structure on the same domain, search engines will treat the new URLs as different pages. Without redirects, the old pages may disappear from search results and any authority they had can be lost. The correct approach is to set up 301 redirects from every old URL to its new version, update internal links, and submit an updated XML sitemap so crawlers can quickly discover the new structure.
If you move to an entirely new domain, the process is similar but slightly larger in scope. All old URLs should still 301 redirect to their matching pages on the new domain, and the site should be verified in Google Search Console so a domain change can be submitted through the Change of Address tool. It is also important to update canonical tags, sitemaps, and important backlinks where possible so search engines clearly understand that the website has permanently moved.
What is mobile first indexing and how do I make sure my site is ready for it?
Mobile first indexing means Google primarily uses the mobile version of a page when it crawls and indexes your site. If your site has different mobile and desktop versions, Google will mainly look at the mobile one to understand the content, links, and structured data. If important content only exists on desktop, it may not be considered during indexing.
To make sure your site is ready, the mobile version should contain the same main content, headings, internal links, and structured data as the desktop version. Responsive design is usually the safest setup because the same HTML is served to all devices and only the layout changes with CSS. It is also important that mobile pages load properly, do not hide key content, and allow Googlebot to access all required resources like CSS, JavaScript, and images.
How do redirect chains and redirect loops hurt SEO and how do I fix them?
A redirect chain happens when one URL redirects to another, which then redirects again before reaching the final page. For example: Page A redirects to Page B, and Page B redirects to Page C. Each extra step slows down loading, wastes crawl budget, and makes it harder for search engines to pass ranking signals efficiently to the final page.
A redirect loop is when URLs keep redirecting to each other and the browser never reaches a real page, such as Page A redirecting to Page B while Page B redirects back to Page A. In this case the page cannot load at all. The fix is to review your redirect rules and make sure every old URL points directly to the final destination in a single redirect.
What is structured data and should every website use it?
Structured data is a standardized way to label information on a page so search engines can clearly understand what the content represents. It is usually implemented using Schema.org vocabulary in JSON LD format. For example, you can mark up things like products, reviews, articles, recipes, events, or organization details so search engines can interpret them more reliably.
When supported, structured data can enable enhanced search results such as review stars, product prices, breadcrumbs, or recipe information. Some features, like FAQ rich results, are now shown much less frequently than before, so markup does not guarantee special search features. Even so, structured data still helps search engines interpret page content more accurately and connect it with relevant search queries.
Do I need to worry about hreflang tags if my website serves multiple languages or countries?
If your site targets different languages or regions, hreflang tags are extremely important. They tell search engines which version of a page should be shown to users in specific countries or languages.
Without hreflang, Google may show the wrong language version or treat different language pages as duplicates. Correct implementation ensures users see the version of your content that is most relevant to them.
How do I find and fix orphan pages on my website?
Orphan pages are pages that exist on your site but are not linked from any other page. Because search engines mainly discover content by following links, these pages can easily remain uncrawled or receive very little ranking strength.
The easiest way to find them is by comparing your sitemap or CMS page list with a crawl of your internal links. Pages that appear in the first list but not the second are likely orphans. Once found, add relevant internal links or evaluate whether the page should remain on the site.
What is the rel="nofollow" attribute on links and when should I use it?
The rel="nofollow" attribute tells search engines not to pass ranking signals through a specific link. It was originally created to reduce comment spam and is now commonly used for sponsored links or user generated content.
You should use it on paid links, untrusted user submissions, or utility pages where passing authority makes no sense. What you should avoid is using it excessively within your own internal links, since that can create confusing signals about your site's structure.